Step 1
Install SABnzbd+ from the Snap Store. If the Snap Store is not yet installed, you can find a short instruction here.
Step 2
SABnzbd can be used in your browser. You can open it by using the desktop icon or you can reach it by entering localhost:8080 in your browser url bar. As first Step you have to configure SABnzbd. Please select your language to start the Wizzard.
Step 3
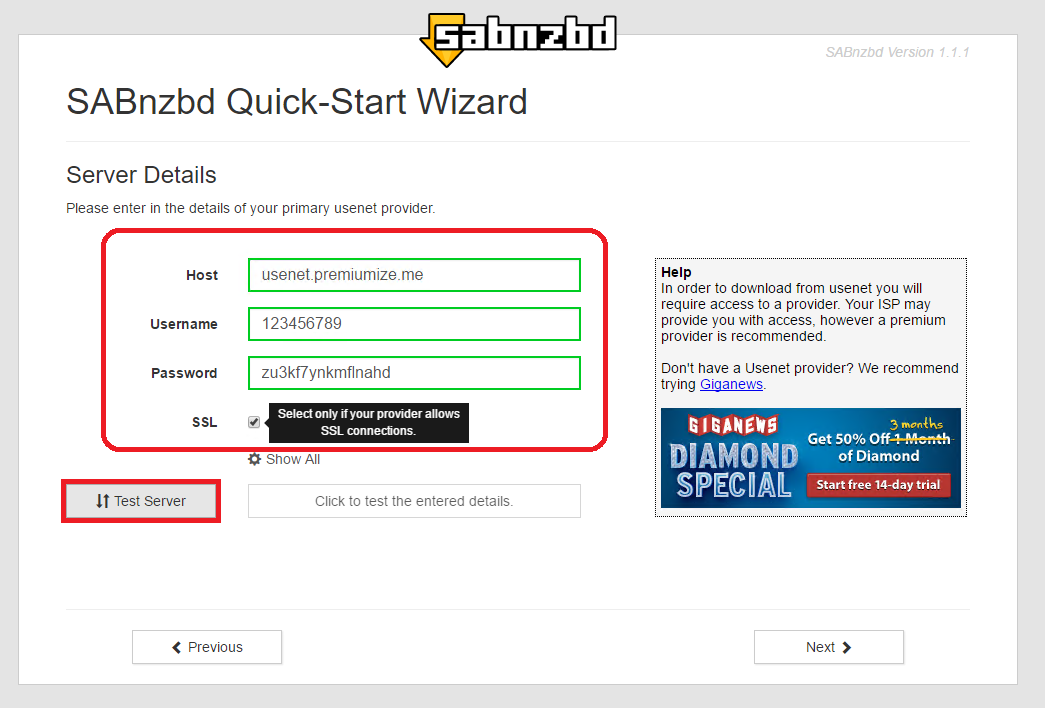
You now have to configure the Premiumize.me Usenet server. Please enter the following into the form:
- Host: usenet.premiumize.me
- Username: your customer id
- Password: your API Key
- SSL: tick if you want to use SSL (recommended)
Addionally you can set the max. number of connections when clicking on Show All. If you want to change this (default: 6) we do allow max. 25 connections. Click on Test Server to test your server settings.
If all settings are correct, you should see Connection Successful!.

Step 4
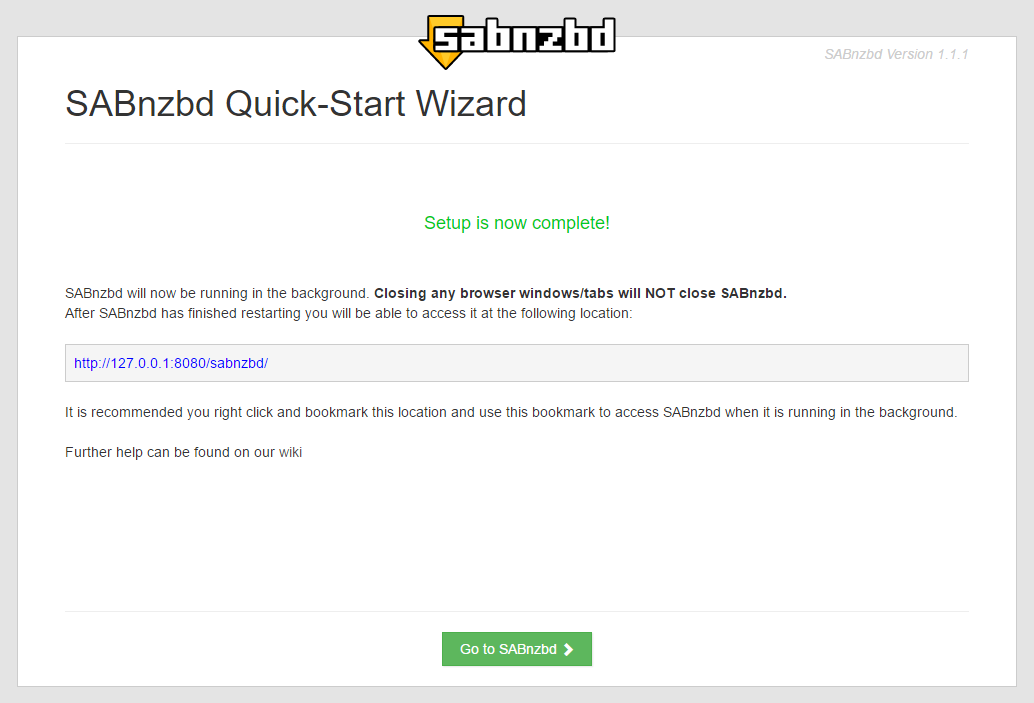
SABnzbd will restart now. Just wait and do nothing until you see this screen. Please read the information on the site carefully to understand how SABnzbd works. We recommend to click the green button, continue to SABnzbd and create a bookmark.

Step 5
That's all, SABnzbd is now installed. You can add a .nzb file using the little button.

This tutorial was created for version 1.1.1 on Ubuntu 16.04 LTS, so images in later versions may differ slightly, but the functionality should be the same. If not, please contact our customer service so that we can revise the tutorial and help you.
